Outlook 2019 has been the go-to email client for business for almost twenty years, and it’s likewise a top pick of many home and easygoing clients. In Outlook 2019, Microsoft has taken client criticism and given a few new highlights that make Outlook considerably simpler and less difficult to work with.
Outlook resembles a chameleon. Its buttons and highlights can change a considerable amount contingent upon what sort of records you have. Assuming you’re utilizing a Microsoft Exchange email to represent your working environment, for instance, you’ll approach a large group of elements that others never get to see, such as booking gathering rooms and other gathering spaces when you plan a gathering and making programmed out-of-office answers for email. Furthermore, assuming you have a POP email account, you have choices, for example, status banners and shading classes that you can allot to messages and schedule occasions. Individuals with IMAP email accounts don’t get those. So assuming your screen appears to be unique based on what’s displayed in this article, that is one motivation behind why. Another explanation is you may be utilizing Office 365, which Microsoft intermittently refreshes, so you might have more highlights or a somewhat unique look to certain screens.
Simpler Account Setup . . .
Throughout the long term, Microsoft has made Outlook’s record arrangement process logically simpler, recognizing increasingly more of the required settings with every adaptation. Now, in Outlook 2019, it’s for all intents and purposes secure. Gone is the need to realize specialized subtleties like mail server names and port numbers (except if you’re setting up some extraordinary kind of record, or you’re associating with an Exchange server). As a rule, you simply tell Outlook your email address and secret key and it wraps up.
This is the way to set another Outlook account up naturally.
That’s how it’s supposed to work. If it doesn’t for some reason, try again, but before step 4, click Advanced Options, and then mark the Let me set up my account manually check box.

Choose to configure the account manually.
Then in the Advanced Setup box, choose the mail server type. Then when prompted to enter your password, do it and click Connect.
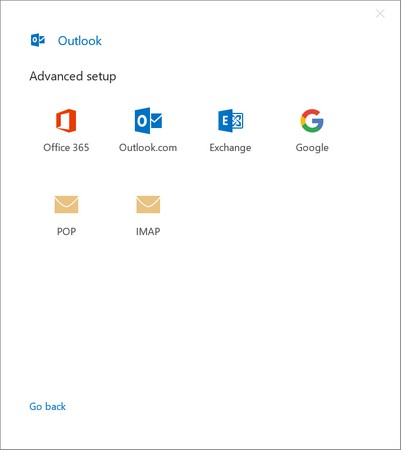
Select the mail server type.
Yet, stand by, the nerd among you are saying, how is choosing the server type “progressed arrangement?” You’re correct, it isn’t. Assuming you truly need to get in there and change the settings, similar to the security, the port number, the mail server address, something like that, see the following area.
Contingent upon the server type, some of the time Outlook prompts you for the server data when you pick Advanced Setup (for instance, on the off chance that you’re interfacing with an Exchange server). However, for customary IMAP and POP records, it keeps it straightforward.
But Trickier Advanced Account Setup
In its quest to make mail setup simple, Microsoft has made it more cumbersome for those of us who want to access the mail server settings. The average person will never find them. And maybe that’s the objective — to keep unskilled users out of areas they shouldn’t be in — but it’s frustrating to us who actually do have reasons to go there.
You might think that the Change command would give you access to the server settings, but it doesn’t. See for yourself:
- Choose File → Info → Account Settings → Account Settings to open the Account Settings dialog box if it’s not already open.
- Select the account to modify and then click Change
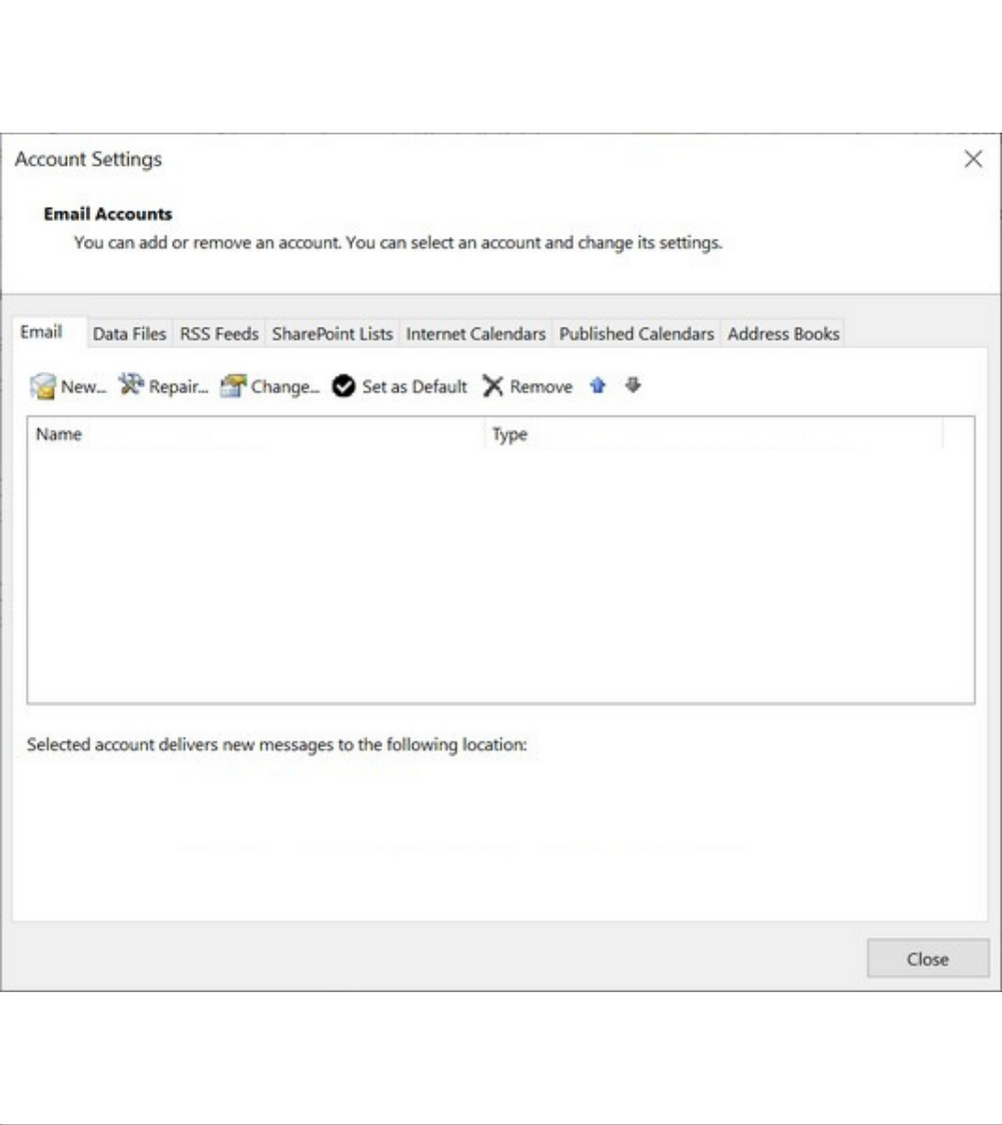
Choose Change after selecting an account.
- In the Account Settings dialog box, make any settings changes as desired.But as you can see below, the available settings have nothing to do with the mail server configuration.
- Select Next and then select Done.
These are the changes you can make post-configuration to the account.
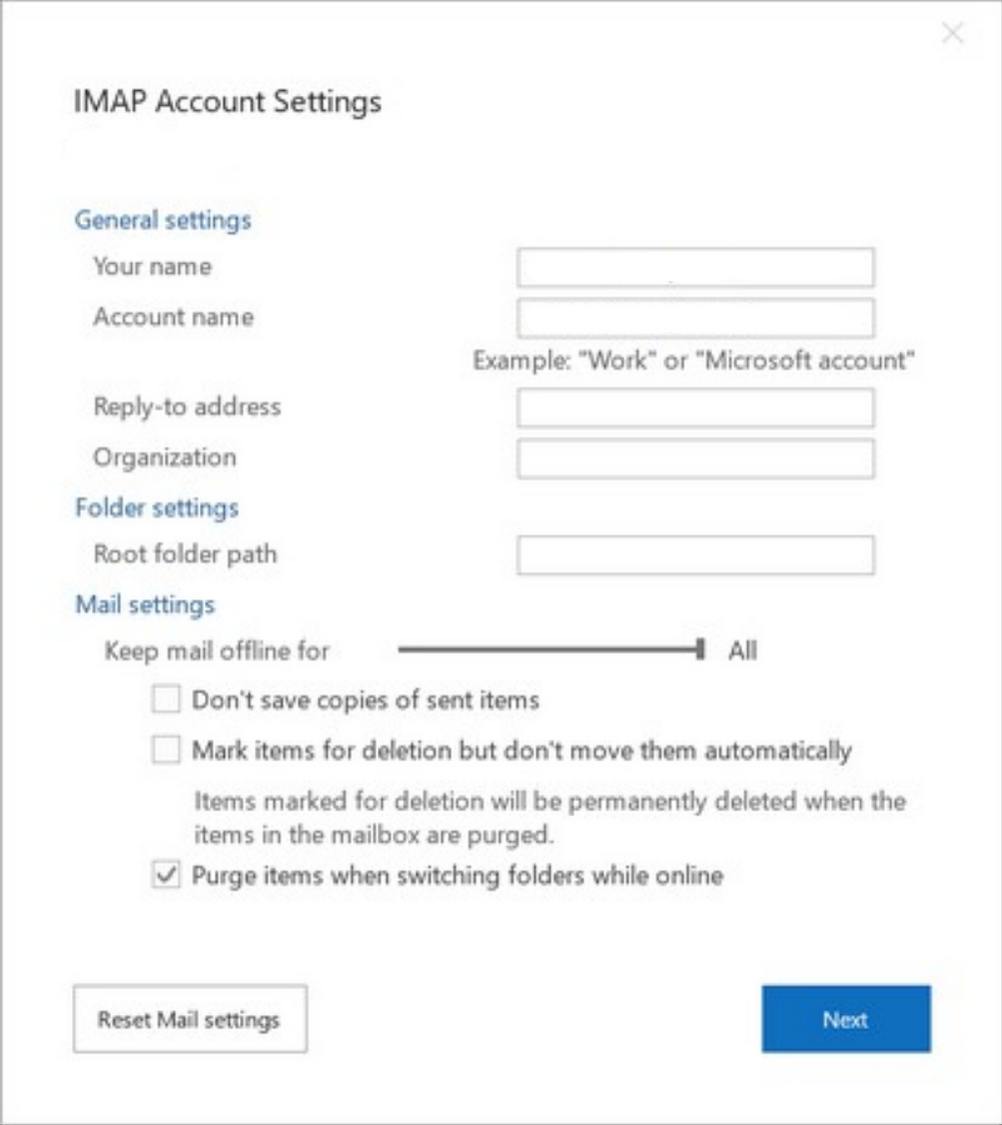
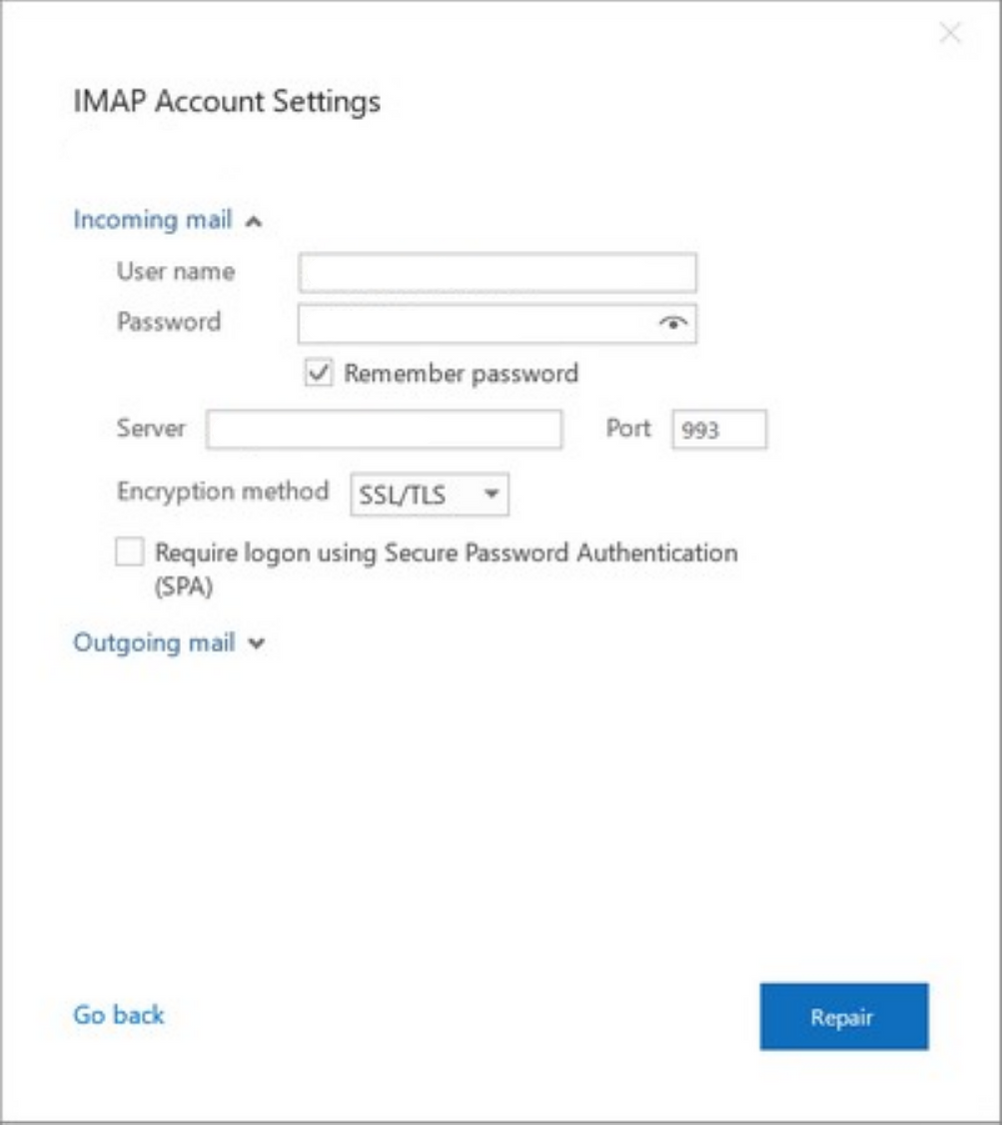
Here’s where it gets tricky. To get at the actual mail server settings, you have to use the Repair command, like this:
- From the Account Settings dialog box, select the account and then click Repair.
- Select Advanced Options.
- Mark the Let me repair my account manually check box. Then click Repair.
- Finally here are the settings you need. Change the incoming mail server information here.
Click Outgoing mail to see the outgoing mail server settings. Make any changes to them as needed.
5) Click Outgoing mail to see the outgoing mail server settings. Make any changes to them as needed.
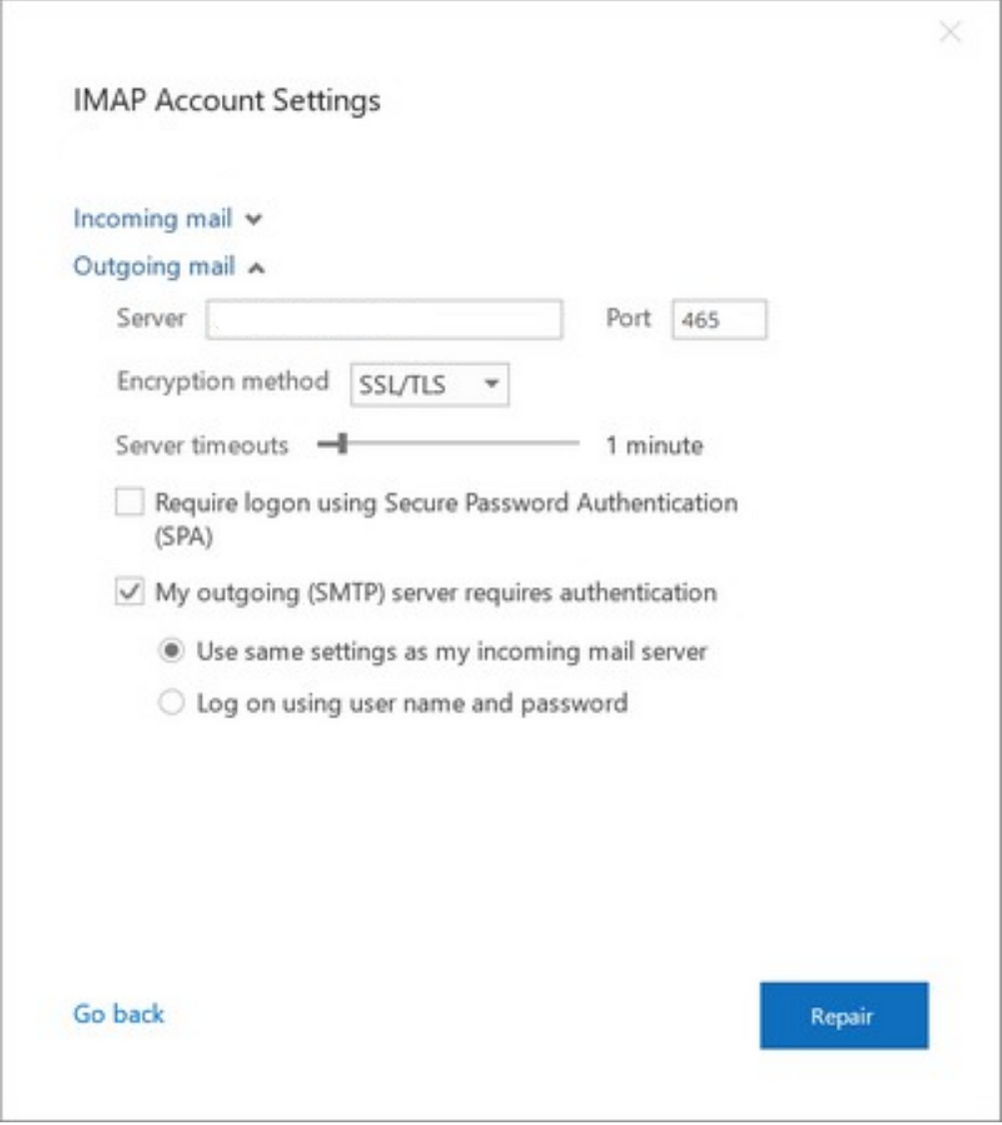
Select Repair to apply the settings changes.
At the confirmation message, click Done.